Jobs: Your Control Center
Informationen zum Artikel

Autor: Dmitry Dugarev
Jobs is your daily work tool. This is where the appointments from your calendar land, where you fill in whatever's still missing – and where your invoices are created from.
A job documents one assignment: what happened, when, for whom, who's paying, and how you got there. What it costs follows automatically from that.
The List
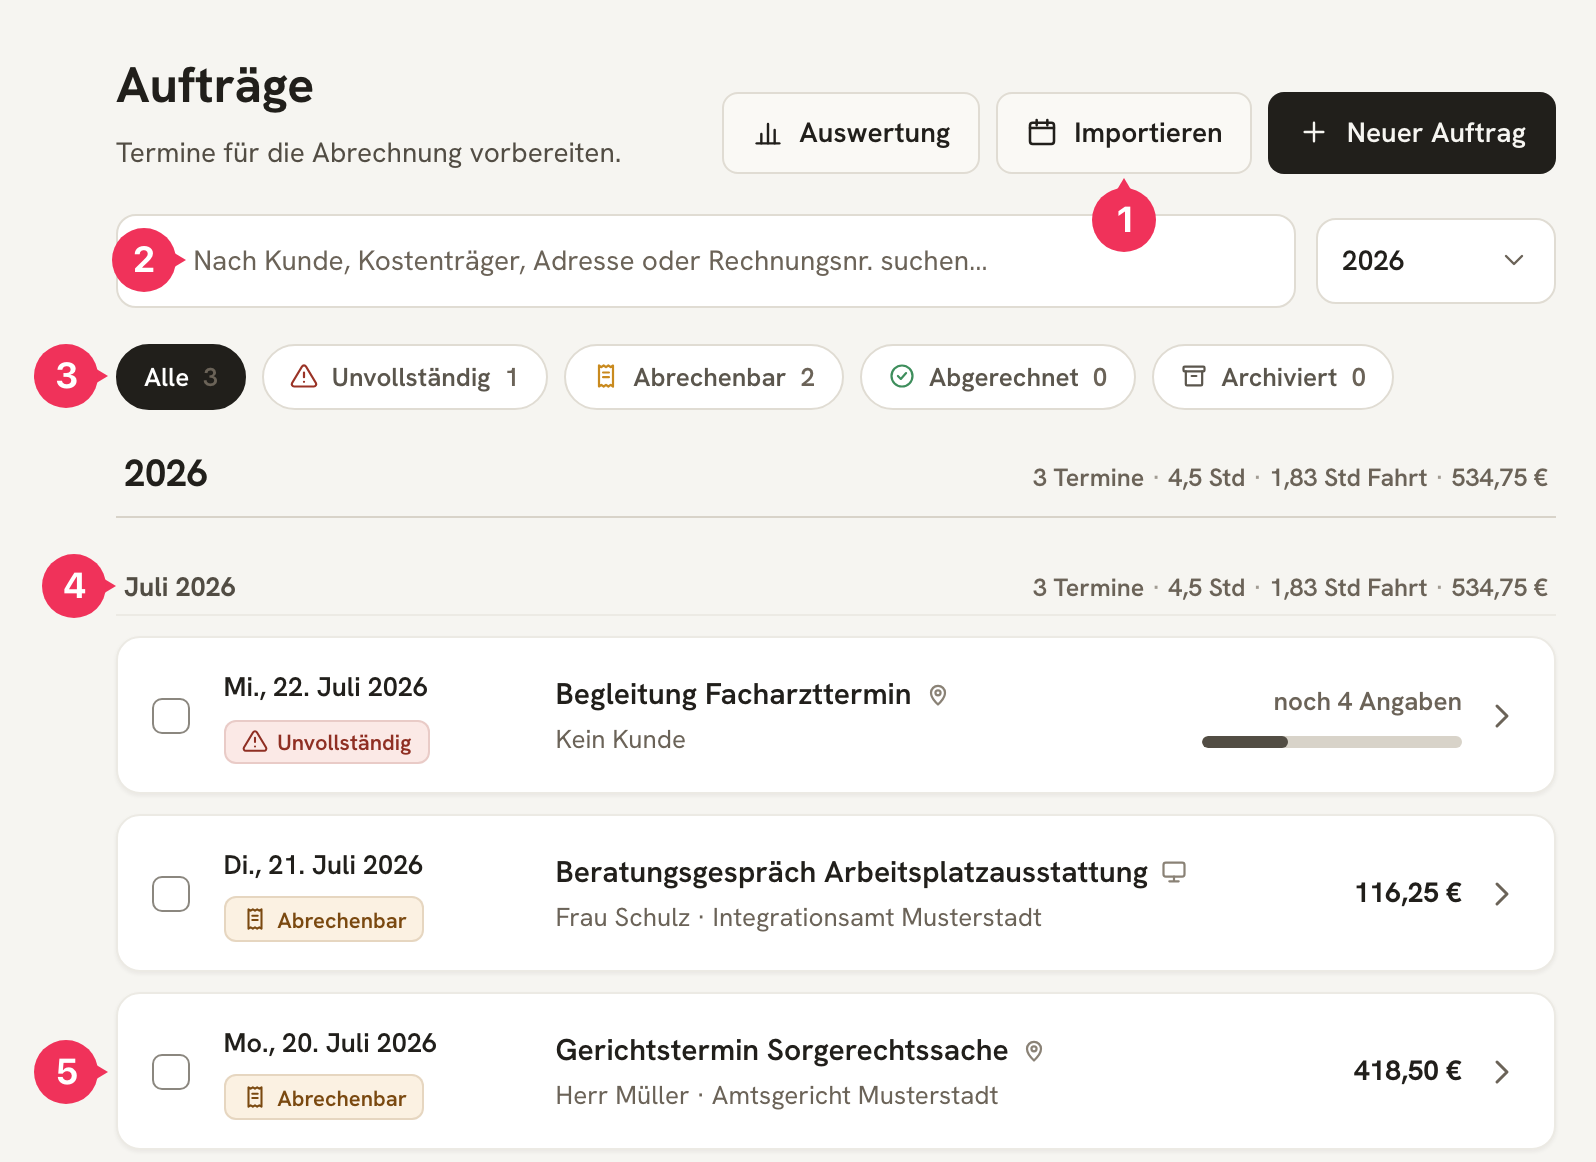
- Importieren (Import) pulls new appointments in from the calendar – see The Import Process. Next to it, Neuer Auftrag (New Job) creates an assignment by hand.
- The search finds jobs by client, Kostenträger (cost bearer), address, or invoice number. Just to the right of it, you can narrow things down to a year.
- The status filters show you at a glance how much work is still outstanding.
- The total rows for each year and month: number of appointments, interpreting hours, travel hours, and amount.
- Each row is a job: date, status, occasion with a type icon, client · Kostenträger – and on the right, either the projected amount or, for incomplete jobs, how many details are still missing.
Status
The status is derived, not set by hand. You don't need to “approve” anything – a job becomes billable as soon as it's fully documented.
| Status | Meaning | Your task |
|---|---|---|
| Unvollständig (Incomplete) | Some details are still missing. The row tells you how many. | Open the job and fill in the highlighted fields. |
| Abrechenbar (Billable) | Everything's in place. The amount appears on the right of the row. | Select it and bill it. |
| Abgerechnet (Billed) | The job is attached to an invoice. | Nothing – it's read-only. |
| Archiviert (Archived) | Removed from the lists, but not deleted. | Nothing. You can restore it anytime. |
Exactly which details are required is covered under Completeness check.
A Job in Detail
Clicking a row opens the job. It's organized into sections that follow exactly the order in which you have the data.
Termin
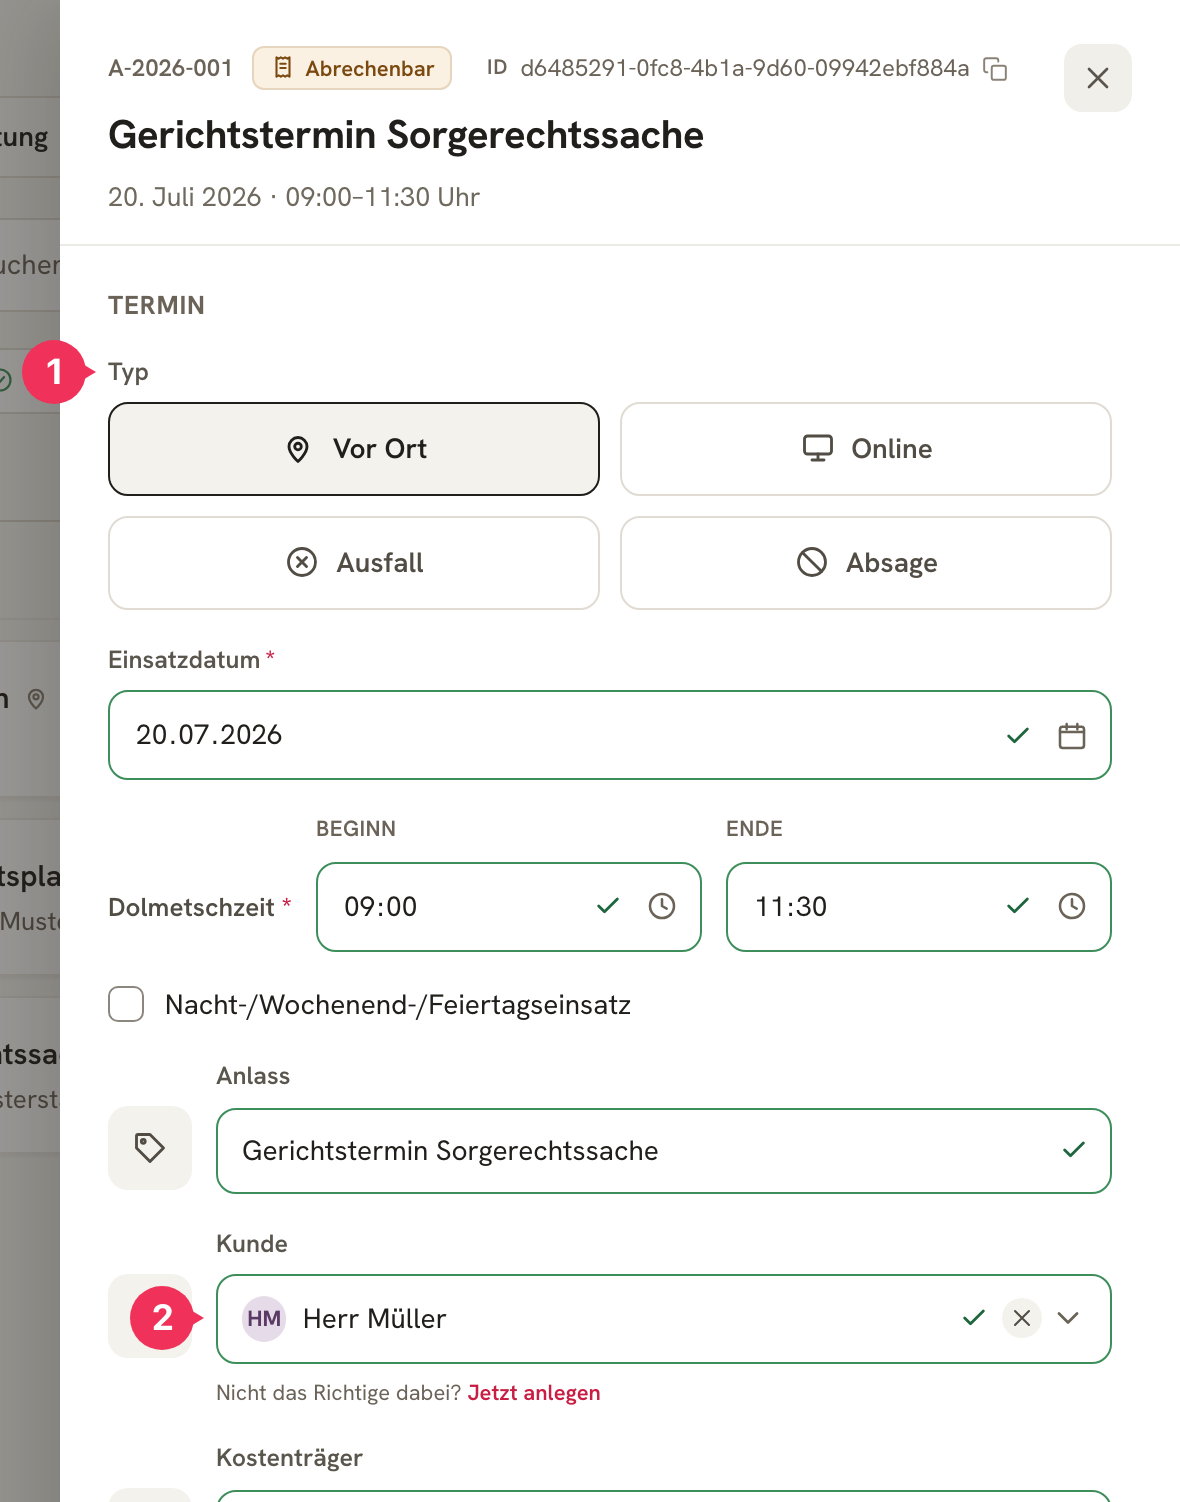
- Typ (type) determines the entire billing:
Vor Ort,Online,Ausfall(you were there, but the appointment fell through), orAbsage(cancelled in time, no trip taken). On import it comes from the calendar title; here you can correct it. - Kunde and Kostenträger (client and cost bearer) link the job to your master data. If you select a client, their default Kostenträger is suggested.
Then come the Einsatzdatum (assignment date), the Dolmetschzeit (interpreting time – start and end), the Anlass (occasion) – and the Nacht-/Wochenend-/Feiertagseinsatz toggle for night, weekend, or public-holiday assignments, which triggers the Abrechnungsmodell's percentage surcharge.
For the Ausfall and Absage types, three additional required fields appear: Abgesagt am, Abgesagt durch, and Auftraggeber. Kostenträger require this information before they'll reimburse Ausfallkosten (no-show fee).
Fahrt
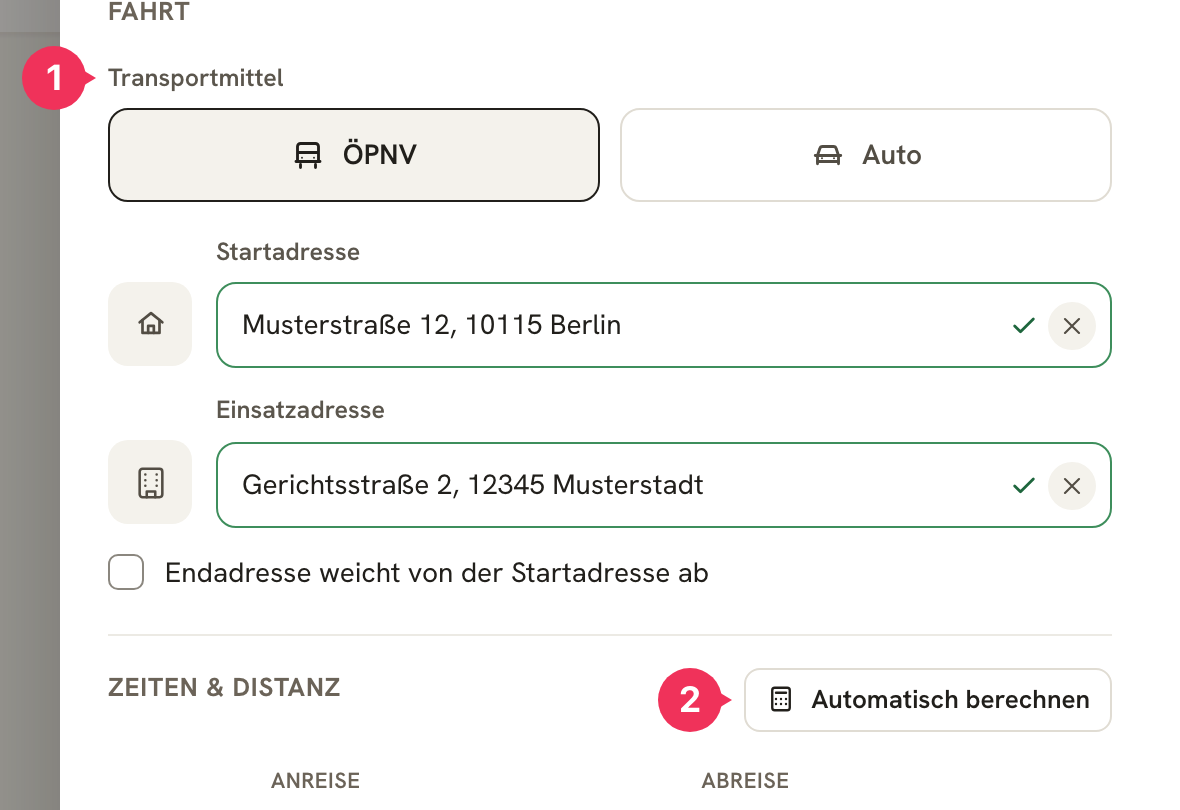
- Transportmittel (mode of transport) – ÖPNV (public transport) or car. It determines how your travel gets reimbursed: mileage allowance and parking fees for a car, ticket price (or Deutschland-Ticket) for ÖPNV.
- Automatisch berechnen (Calculate automatically) works out departure, arrival, and distance for the outbound and return trip from the addresses – including the buffer times from your settings. On import this already happens by itself; here you trigger it again yourself after every address or time change.
In between are the three addresses: Startadresse (your home address or the previous assignment), Einsatzadresse, and – if it differs – the Endadresse.
Depending on the mode of transport, this is followed either by the ÖPNV-Ticket section (tick Deutschland-Ticket, or enter a ticket price and receipt) or by the fields for Parkentgelte (parking fees) and the parking receipt.
Anlagen und Abrechnung
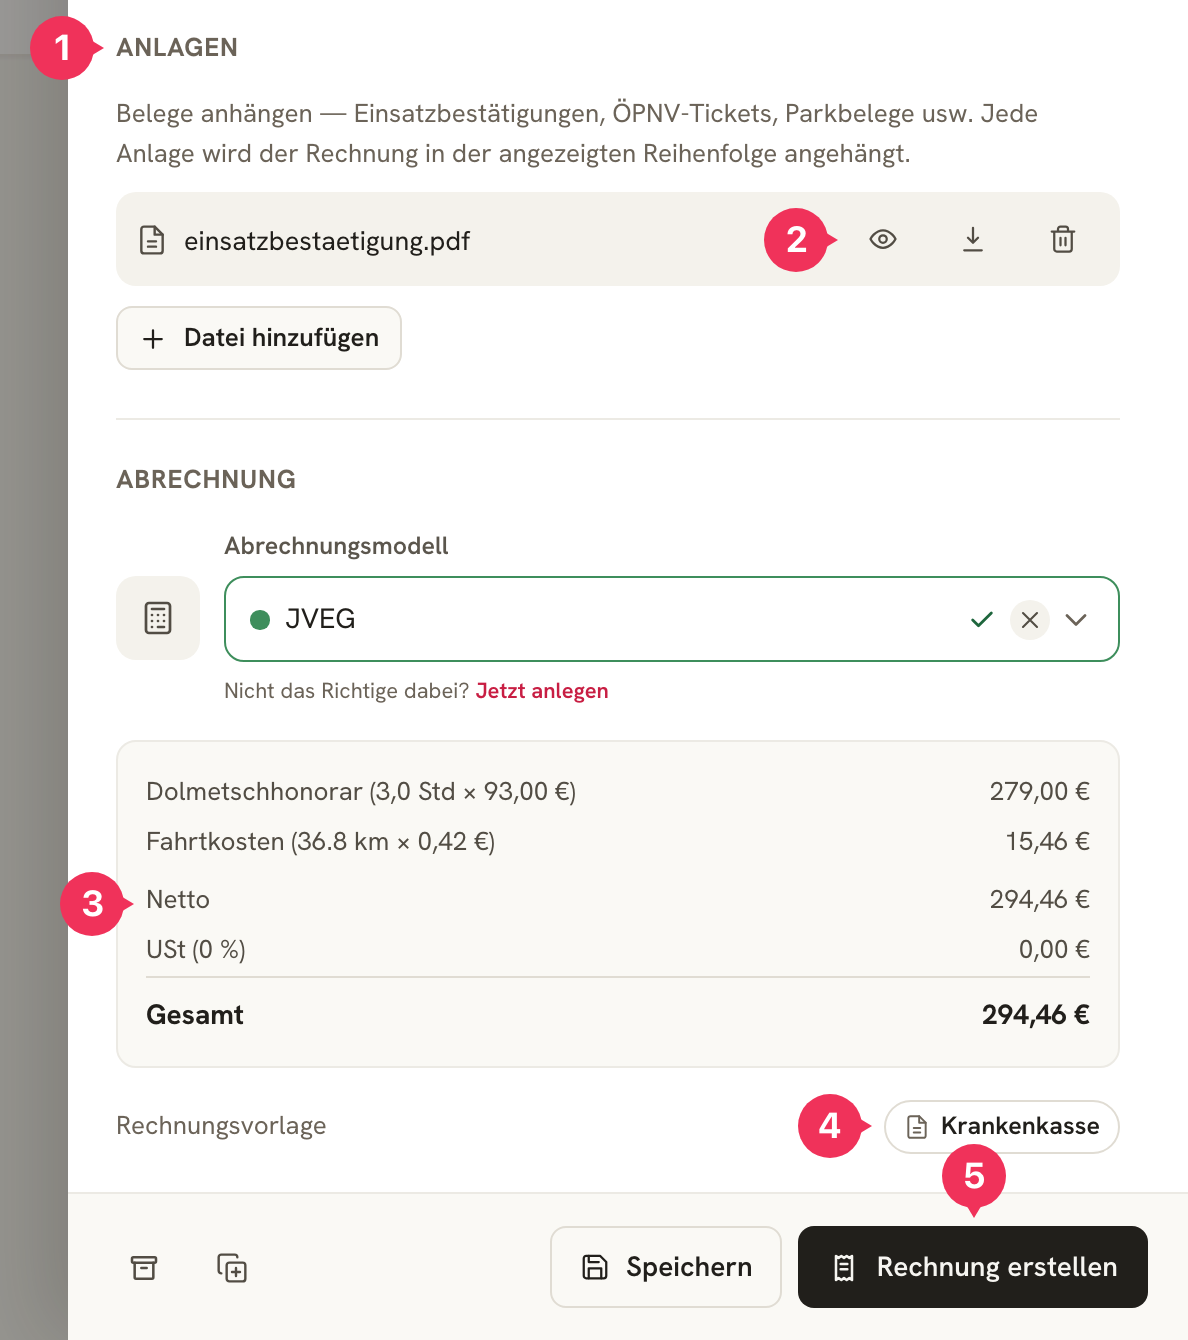
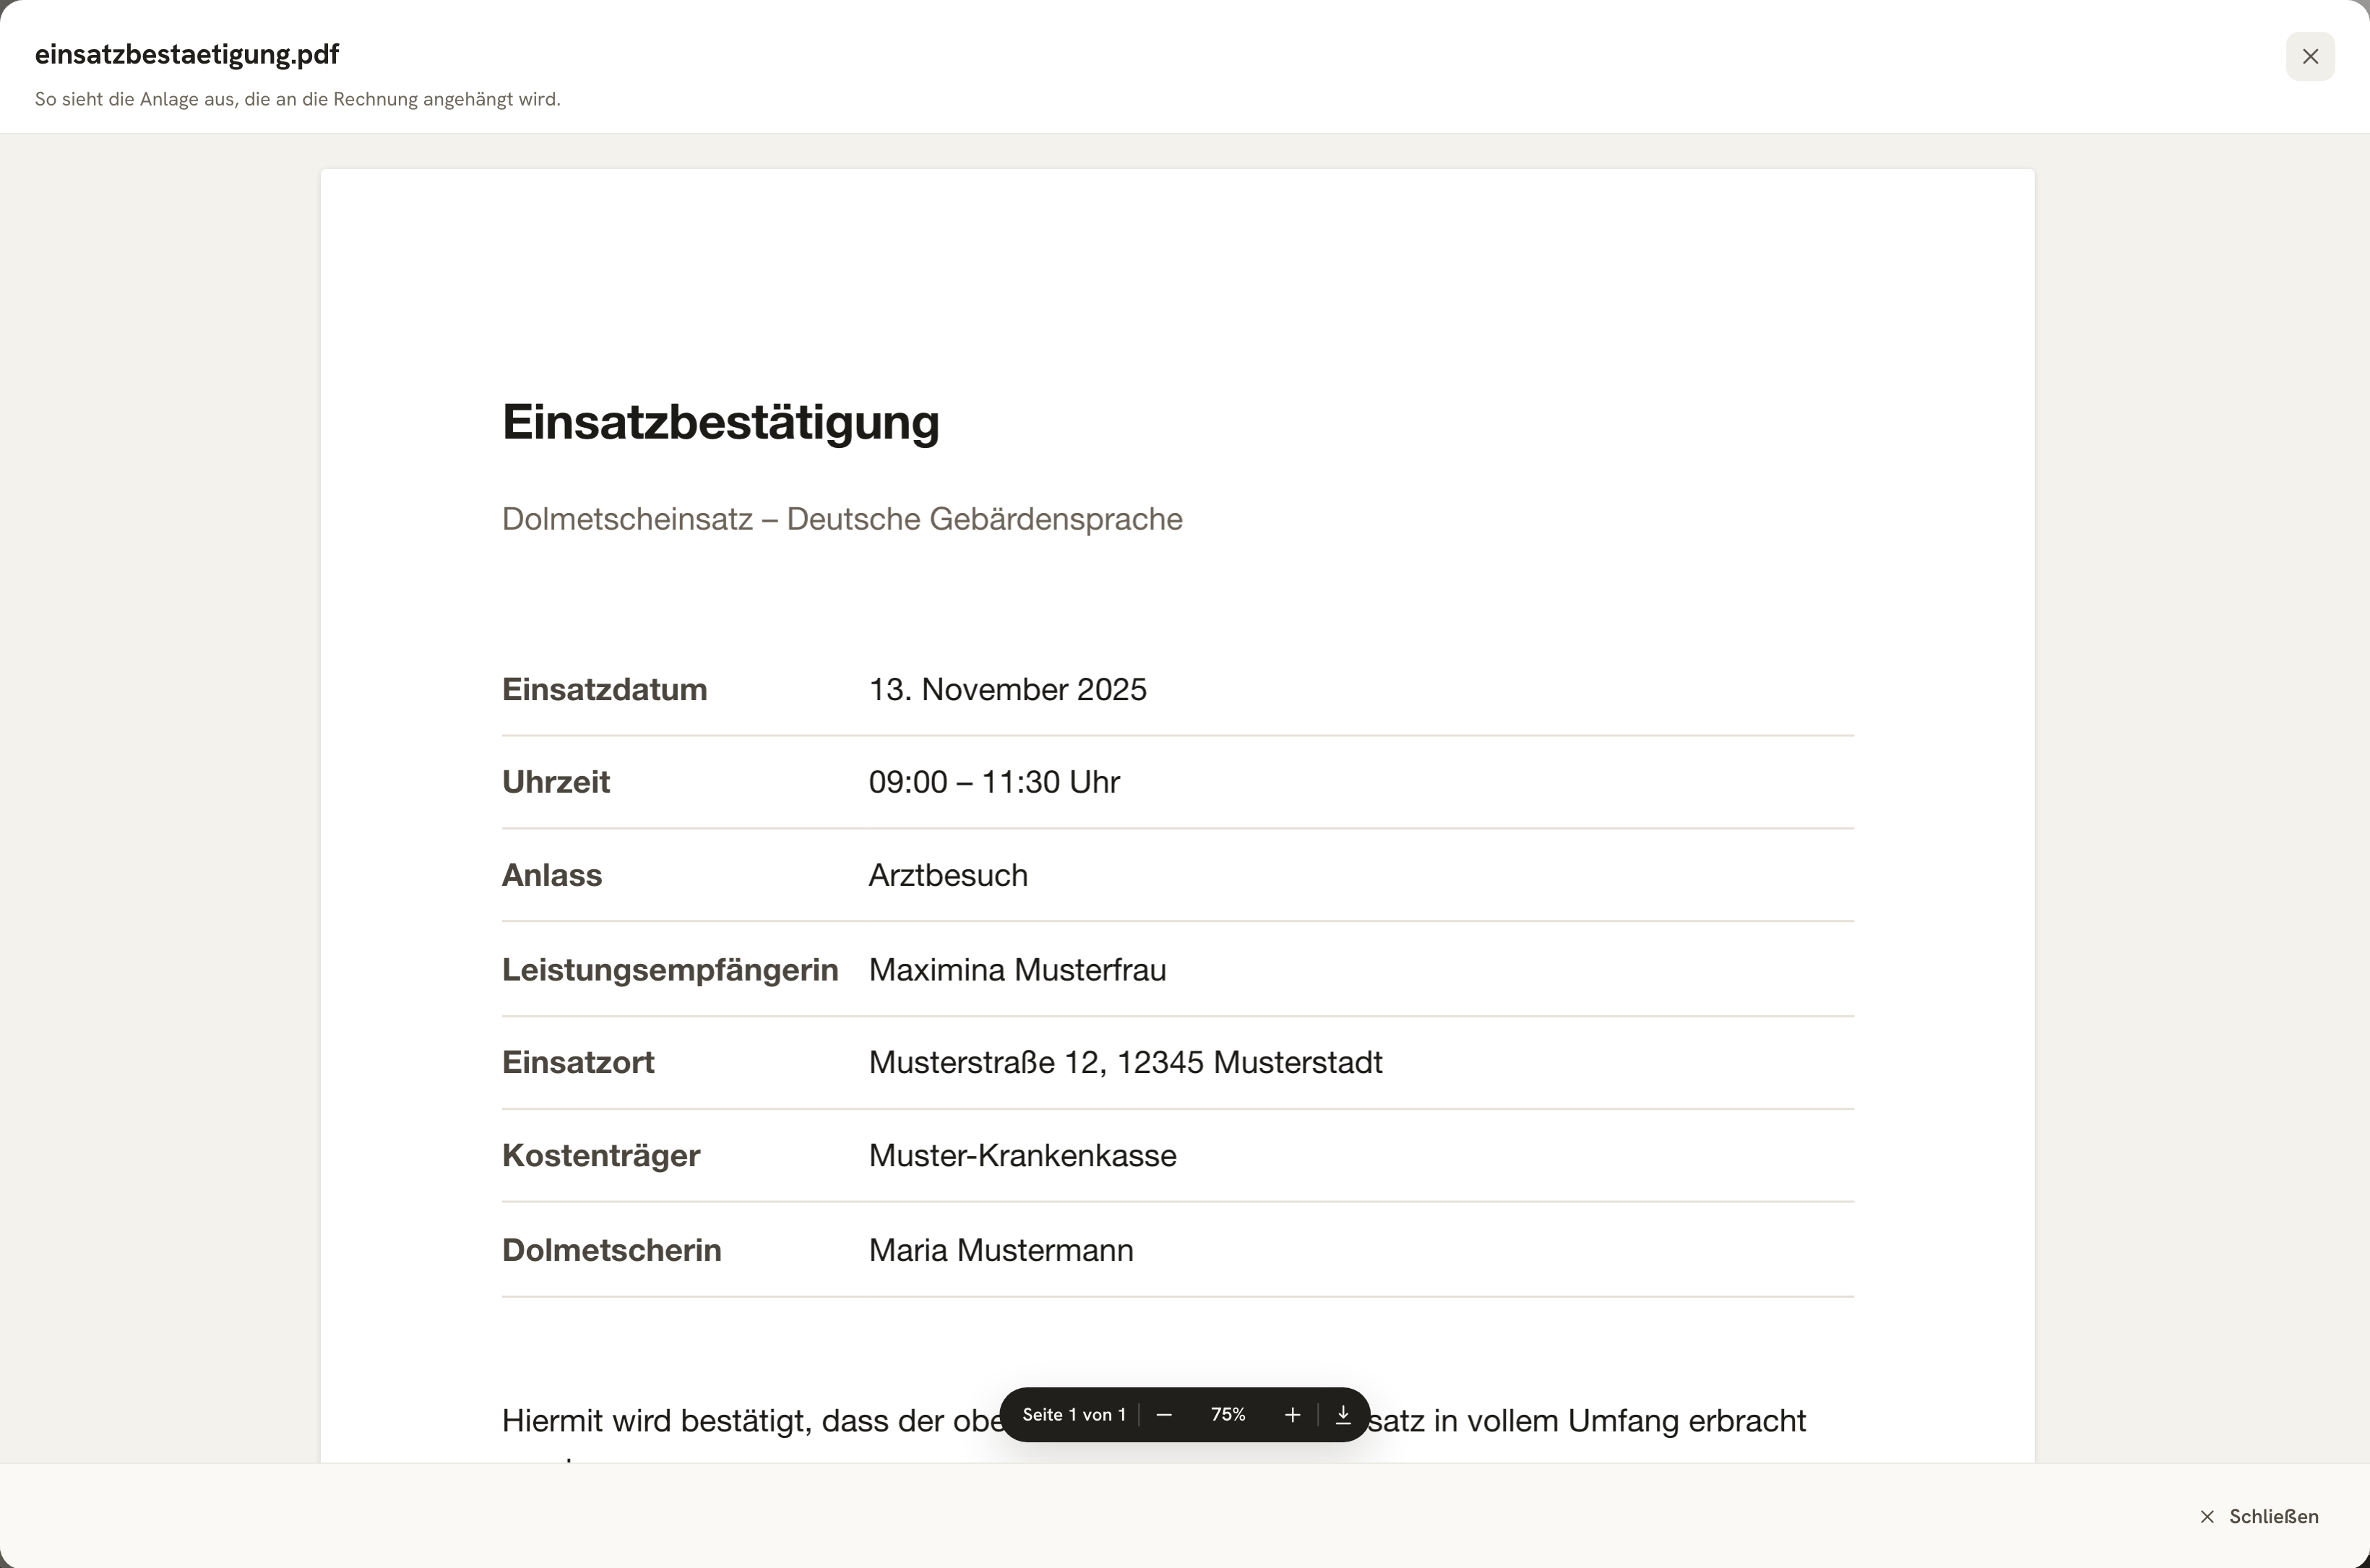
- Anlagen (attachments) – assignment confirmations, tickets, parking receipts as PDF, JPG, or PNG. Each attachment is included with the eventual invoice in the order shown. Files imported from the calendar are already here.
- The eye icon opens the attachment – exactly as it will appear attached to the invoice. Handy for checking, before you bill, whether the right file was actually uploaded and whether it's legible.
- The breakdown shows live what the job will bring in – broken down by the line items of the Abrechnungsmodell (billing model), with net amount, VAT, and total. The model normally comes from the Kostenträger, but can be overridden here on a per-job basis.
- The invoice template field shows which template will supply the wording and line-item names for the invoice – normally the Kostenträger's, otherwise your default template. Click it to open it for editing. If something reads a bit off in the preview, this is where you go straight to the place where you can change it.
- Rechnung erstellen (Create Invoice) bills this one job – but shows you the finished invoice first.
From Job to Invoice
For a single job, the Rechnung erstellen button on the job itself is enough – it shows you the invoice first as a preview. For several jobs, go via the list:

- The bar shows you what's about to happen: how many jobs are selected, how many invoices will result from them, and for what amount. Multiple jobs for the same Kostenträger are bundled into one combined invoice – the bar flags this as “× Sammel”.
- Rechnungen erstellen (Create Invoices) starts the process.
What happens next – checking it, sending it, sending reminders – is covered under Creating Invoices.
Jobs Without a Calendar
Not every assignment lives in the calendar – a spontaneous appointment, something added after the fact, a job from before you started with DolmiDesk™. Use Neuer Auftrag (New Job) to create it by hand. The form is the same as above; the only thing you have to trigger yourself is the travel data (Automatisch berechnen), once the addresses are set.
Duplicate, Archive, Delete
Via the selection bar – or at the bottom of an opened job – three more actions are available:
| Action | Effect |
|---|---|
| Duplizieren (Duplicate) | Creates a copy. Handy for recurring assignments with the same addresses. |
| Archivieren (Archive) | Removes the job from the lists without deleting it. It stays linked to its documents and can be restored anytime via the Archiviert filter. |
| Löschen (Delete) | Removes the job permanently. |
Auswertung
The Auswertung (analysis) button in the top right opens the job analysis: jobs per month, billing status, and hours worked – handy for seeing how much is still sitting there unbilled.
About the author